


How to Convert AVI to QuickTime Format?
To convert AVI to QuickTime format, we need to download iCoolsoft QuickTime Converter first.
iCoolsoft QuickTime Converter is a very useful software which can help us to convert videos with any kind of format into QuickTime MOV format, HD MOV format, MP4 format, or M4V format. It is perfectly designed so the conversion speed is very fast and the quality of the converted file is very good. Besides, the software also supports you to edit the original video files as you like. For example, you can only convert the part you need of the original video file into QuickTime Format. With iCoolsoft QuickTime Converter, you could also convert audio files, take snapshot of the original video, and select audio track and subtitle easily.
In a word, it is worth trying. Follow the guide below and get your own QuickTime MOV format of videos right now!
1. Add file
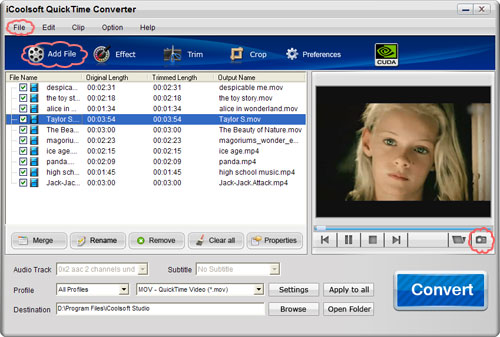
To add file, you can either click the "Add File" button or drag the file into the interface of the software directly. You are allowed to add several files at a time. After adding files, select one file and click the play button under the preview window, then you can take snapshot of the scene you like by clicking the camera button.
2. Edit file
Select one file and click "Effect", "Trim", or "Crop" button then you can adjust the effect, trim any time length of clips, crop video image size and add text or picture watermark to the original file.

3. Select the output format
From the drop-down list of "Profile", you can find the video format you want for the output files. Selecting one file from the file list and then choosing the output format is Ok. You can choose different output formats for different original files and convert them at the same time.
4. Set the destination
"Destination" is the folder where you would like to storage the converted files. Click the "Browse" button to finish this step. If you do not choose a specific one which is easy for you to find out, you can also click the "Open Folder" button to open the preset folder quickly.
5. Start the conversion
To start the conversion you just need to click the "Convert" button. And then you will see the converting process, know how long it still needs to finish the conversion, and check whether it is the one you want to convert. Check the "Open output folder when conversion completed" and you will find the converted file at the first time the conversion finished.
