


How to convert videos for iriver P7?
iriver P7:

Specification of P7:
Audio File: MP3, WMA, WAV, OGG, FLAC
Video File: RM/RMVB, AVI, MP4, DAT, MPG, VOB, WMV, 3GP/K3G, FLV
Video Codec: MPEG-1, MPEG-2, MPEG-4 Simple Profile, MPEG-4 Adcanced Simple Profile (B-VOP only), Xvid, WMV7/8/9, RM/RMVB H.264 Baseline Profile
With stylish aluminum design and pretty compelling price, iriver P7 has attracted great attention among both professionals and fans. It comes in 8GB and 16 GB capacities; offers music, video, radio, and photo playback, as well as voice recording and a text reader; and presents us with a surprisingly unique magazine-look GUI. Despite the fabulous design and creative advantages, its performance in video flexibility is really disappointing. However, converting videos for iriver P7 is very easy and convenient. Read the following guide and you will be agree with that.
Steps of converting videos for iriver P7:
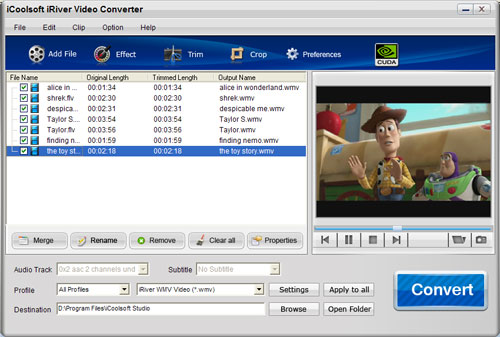
Step 1: Download iCoolsoft iRiver Video Converter, install and launch the software.
Step 2: Click ![]() button on the tool bar to add the video you want to convert. You can preview the video in the preview pane. If you like some scene of the video and want to save it, you can click
button on the tool bar to add the video you want to convert. You can preview the video in the preview pane. If you like some scene of the video and want to save it, you can click ![]() button to take snapshot of it.
button to take snapshot of it.
Step 3: Click button ![]() ,
, ![]() , or
, or ![]() then you can adjust the Brightness, Contrast and Saturation; trim any time length of clips; or crop the display area as you like easily.
then you can adjust the Brightness, Contrast and Saturation; trim any time length of clips; or crop the display area as you like easily.

Tip: In the edit window, click "Watermark" button then you can add text or picture watermark as you like.
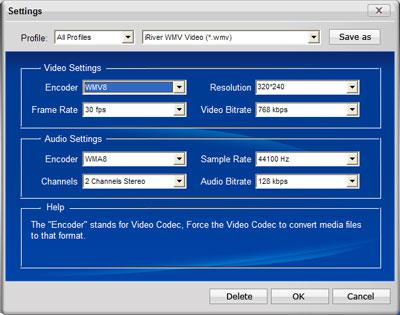
Step 4: Set the output parameters by clicking button "Settings".
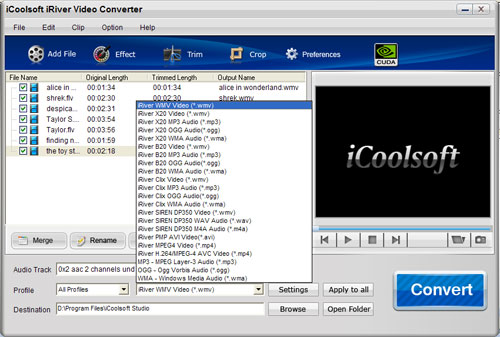
Step 5: Choose iriver format from "Profile" drop-down list, and set export folder by clicking "Browse" button.
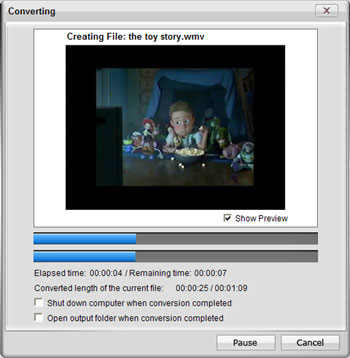
Step 6: Click ![]() button to convert videos. It will show you the progress of the converting. You can also check "Shut down computer when conversion completed" or "Open output folder when conversion completed" there.
button to convert videos. It will show you the progress of the converting. You can also check "Shut down computer when conversion completed" or "Open output folder when conversion completed" there.