


How to Convert FLV to WMV for Zune?
Zune:
 Manufacturer: Microsoft
Type: Portable media player
Operating system: Windows Embedded CE 6.0
CPU: Freescale i. MX31L processor ARM Core
Nvidia Tegra APX 2600 (Zune HD)
Storage capacity: 4, 8, 16, 32, and 64 GB flash drive
30, 80, and 120 GB hard drive
Connectivity: Wi-Fi (Zune-Zune, Sync-PC, Microsoft Surface)
USB
Supported formats: JPEG for images; WMV (Used by Zune Marketplace); MPEG-4 – supported on all models except the Zune 30 device; H.264 – supported on all models except the Zune 30 device; Avi video (Xvid) support is included on the Zune HD (firmware versions 4.5 and later); MP3 (used by Zune Marketplace); AAC (unprotected) not AAC (.m4a); WMA Pro (2-channel); WMA Standard (used by Zune Marketplace); WMA lossless.
How to Convert FLV to WMV for Zune?
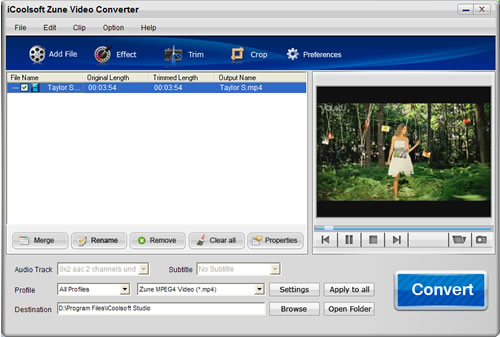
Step 1: Download iCoolsoft Zune Video Converter, set up and launch the software.
Step 2: Click  button on the tool bar to add the FLV video you want to convert. You can preview the video in the preview pane. If you like some scene of the video and want to save it, you can click
  button to take snapshot of it.
Step 3: Click button  ,
,  , or
, or  then you can adjust the Brightness, Contrast and Saturation; trim any time length of clips; or crop the display area as you like easily.
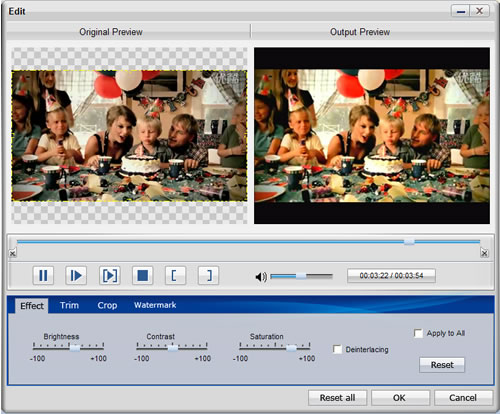
Tip: In the edit window, click "Watermark" button then you can add text or picture watermark for the target video.
Step 4: Set the output parameters by clicking button "Settings".
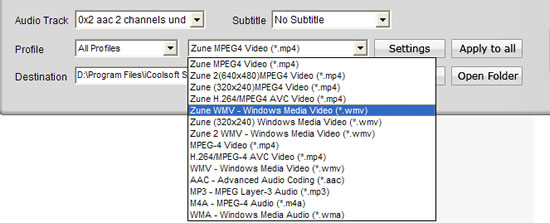
Step 5: Choose WMV format from "Profile" combo-box, and set export folder by clicking "Browse" button.
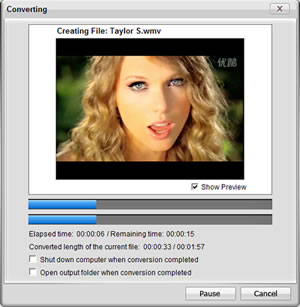
Step 6: Click  button to convert videos. It will show you the progress of the converting. You can also check "Shut down computer when conversion completed" or "Open output folder when conversion completed" for your convenience.