How to Convert MTS to MPEG-4 MP4 and H.264 MP4 Format?
Thanks to the high technology that we could use HD camcorders to record the special moments in our life. Wedding, birthday, graduation... there are always many moments that we would like to review again and again. It is now a very easy thing. However, the video files recorded by the HD camcorders are mostly encoded in the MTS format which can not be accepted by many editing softwares and video players. That makes it very hard for us to edit the video files and play back them through the players conveniently to be used.
Here in this guide, iCoolsoft MTS Converter is recommended to you because it is a very powerful yet easy-to-use MTS to MPEG-4 MP4 and H.264 MP4 converter. With that software, you could easily convert MTS videos to MPEG-4 MP4 and H.264 MP4 format. The conversion speed is very fast and the output quality can be fully ensured. Free download one and have a try!
Main steps of converting MTS to MPEG-4 MP4 and H.264 MP4 format:
Step 1: Free download iCoolsoft MTS Converter, install and launch it.
Step 2: Click "Add Video" button to add the MTS video.
Step 3: Select MPEG-4 MP4 or H.264 MP4 as the output format from the drop-down list of "Profile".
Step 4: Click button "Browse" to set the destination.
Step 5: Click button "Convert" to start converting MTS to MPEG-4 MP4 and H.264 MP4 format.

The software also possesses many practical and easy-to-use functions as below. You can choose them to customize files and improve output quality.
1. Set output parameters
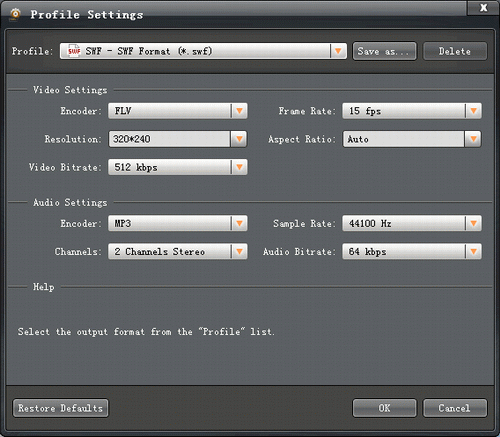
Click button "Settings" then you can set Video Encoder, Video Resolution, Frame Rate, Video Bitrate, Audio Encoder, Sample Rate, Channels, and Audio Bitrate.

2. Preview & Take snapshot
After adding video files, you can preview them in the preview pane and take snapshot of the scenes you like the most of the video freely.
3. Edit the original video files
1) Effect
You can click button "Effect" to adjust Brightness, Contrast and Saturation. You can also check "Deinterlacing" checkbox to avoid mosaic and improve the quality of the video.
2) Trim
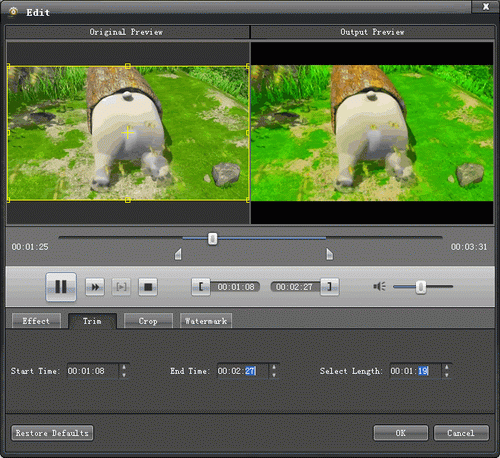
If you only want to convert a segment of the entire video or do not want to convert some certain segment of the video, you can use the trim function. Click button "Trim" and play the video in the Edit window. Besides, there is the third way which is to input the exact start time and end time or one of them and the time duration.

3) Crop
To get rid of the black border or to zoom in some part of the scene, you can click button "Crop" and then drag the yellow frame or adjust the values in the boxes. You can also select "Full Screen", "Keep Original", "16:9" or "4:3" from the drop-down list of "Zoom Mode".
4) Watermark
You can add text or picture watermark to the video.


