


How to Convert YouTube Video to AVI Format?
AVI, acronym of Audio Video Interleave (also Audio Video Interleaved), is a multimedia container format introduced by Microsoft in November 1992 as part of its Video for Windows technology. AVI files can contain both audio and video data in a file container that allows synchronous audio-with-video playback. AVI format is widely used and accepted by many portable devices, such as Wii, BlackBerry, etc.
To convert YouTube FLV to AVI format, we need to take advantage of professional YouTube video to AVI converter. iCoolsoft FLV Converter is a great YouTube FLV video to AVI video converter which could not only support converting YouTube video to AVI, but also support converting between many popular audio/video formats. The conversion of that software is very fast and the output quality can be fully ensured. In addition, it also provides many powerful editing functions which could help you to edit YouTube FLV video as you like.
![]()
Steps of Converting YouTube Video to AVI format:
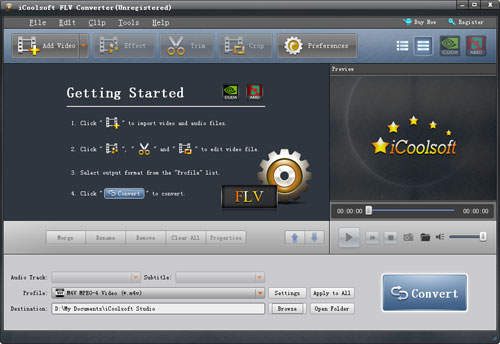
Step 1: Click "Add Video" button to import the YouTube video you want to convert. You can import several video files at a time.
Step 2: Select AVI as the output format from the drop-down list of "Profile".
Step 3: Click button "Browse" to set the destination for saving the converted files.
Step 4: Click button "Convert" to start the conversion from YouTube video to AVI.
The above four steps are all you need to do to convert YouTube video to AVI format. If you want to edit the original YouTube video, you can use the following functions.
> Adjust video effect
You can click button "Effect" to adjust Brightness, Contrast and Saturation. You can also check "Deinterlacing" checkbox to avoid mosaic and improve the quality of the video.
> Trim video clips
If you only want to convert a segment of the entire video or do not want to convert some certain segment of the video, you can use the trim function.
> Crop displaying area
To get rid of the black border or to zoom in some part of the scene, you can click button "Crop" and then drag the yellow frame or adjust the values in the boxes. You can also select "Full Screen", "Keep Original", "16:9" or "4:3" from the drop-down list of "Zoom Mode".
> Add watermark
You can add text or picture watermark to the video.
>Join two or more files together
If you want to merge several files into one file to output, you can select the files from the file list and then click button "Merge". The merged file will be automatically named as "Merge" and listed below.
> Set output parameters
Click button "Settings" then you can set Video Encoder, Video Resolution, Frame Rate, Video Bitrate, Audio Encoder, Sample Rate, Channels, and Audio Bitrate.